I recently needed to add Swift Package Manager support to a legacy package that one of my projects was using. The package was originally distributed with CocoaPods. The primary reason for migrating from CocoaPods to SPM is that CocoaPods entered maintenance mode a few months ago. Removing it will future-proof our projects and allow us to use the latest features, such as the buildable folders introduced in Xcode 16.
Assumptions
- Since this was an internal package, I did not need to maintain CocoaPods support. The goal was to replace it entirely with SPM. It is certainly possible to keep both, but that would require some additional work.
- The project I was working on is considered legacy; no one has touched it in about six years. Once this task is complete, I hope no one will need to update it for another half-dozen years. This allowed me to take some shortcuts, like integrating a third-party dependency directly into the codebase instead of spending time updating it to the latest version.
- All internal dependencies of your framework already support SPM.
With that said, let’s get started.
How?
I’ll assume your framework has no internal dependencies that require the same SPM treatment. If it does, start with the bottom-most dependency and work your way up.
External Dependencies
The first step is to update all external dependencies to use SPM.
In my case, one of the dependencies was PromiseKit, which was stuck six major versions behind the latest release. Since the project was considered legacy and no further development was planned, I decided to cut some corners.
Instead of spending time updating PromiseKit from version 1 through 7, I opted to add SPM support to the version my project was currently using. This approach required significantly less work and proved to be the right choice.
Removing the Old Dependency Manager
With all dependencies migrated to SPM, you should now be able to remove the old dependency manager from your project.
Adding a Swift Package Manifest
Next, initialize a new Swift package in your project’s root directory:
swift package init
This will create a Package.swift file. Here is a basic configuration:
// swift-tools-version: 6.1
import PackageDescription

let package = Package(
    name: "MyPackage",
    products: [
        .library(
            name: "MyPackage",
            targets: ["MyPackage"]),
    ],
    targets: [
        .target(
            name: "MyPackage"),
        .testTarget(
            name: "MyPackageTests",
            dependencies: ["MyPackage"]
        ),
    ]
)
Move your project’s source files to Sources/MyPackage and try to build the project. You will likely encounter one of the following errors:
SomeHeaderFile.h:19:9 'AnotherHeaderFile.h' file not found
or
public headers ("include") directory path for 'MyPackage' is invalid or not contained in the target
These errors indicate that the compiler cannot locate your project’s header files. By default, SPM looks for public headers in an include directory.
Create an include directory inside Sources/MyPackage and move all of your project’s public headers there.
If this structure doesn’t suit your project, you can define a custom path for your public headers by specifying publicHeadersPath in your Package.swift:
    targets: [
        .target(
            name: "MyPackage",
            publicHeadersPath: "some/custom/path"
        ),
        .testTarget(
            name: "MyPackageTests",
            dependencies: ["MyPackage"]
        ),
    ]
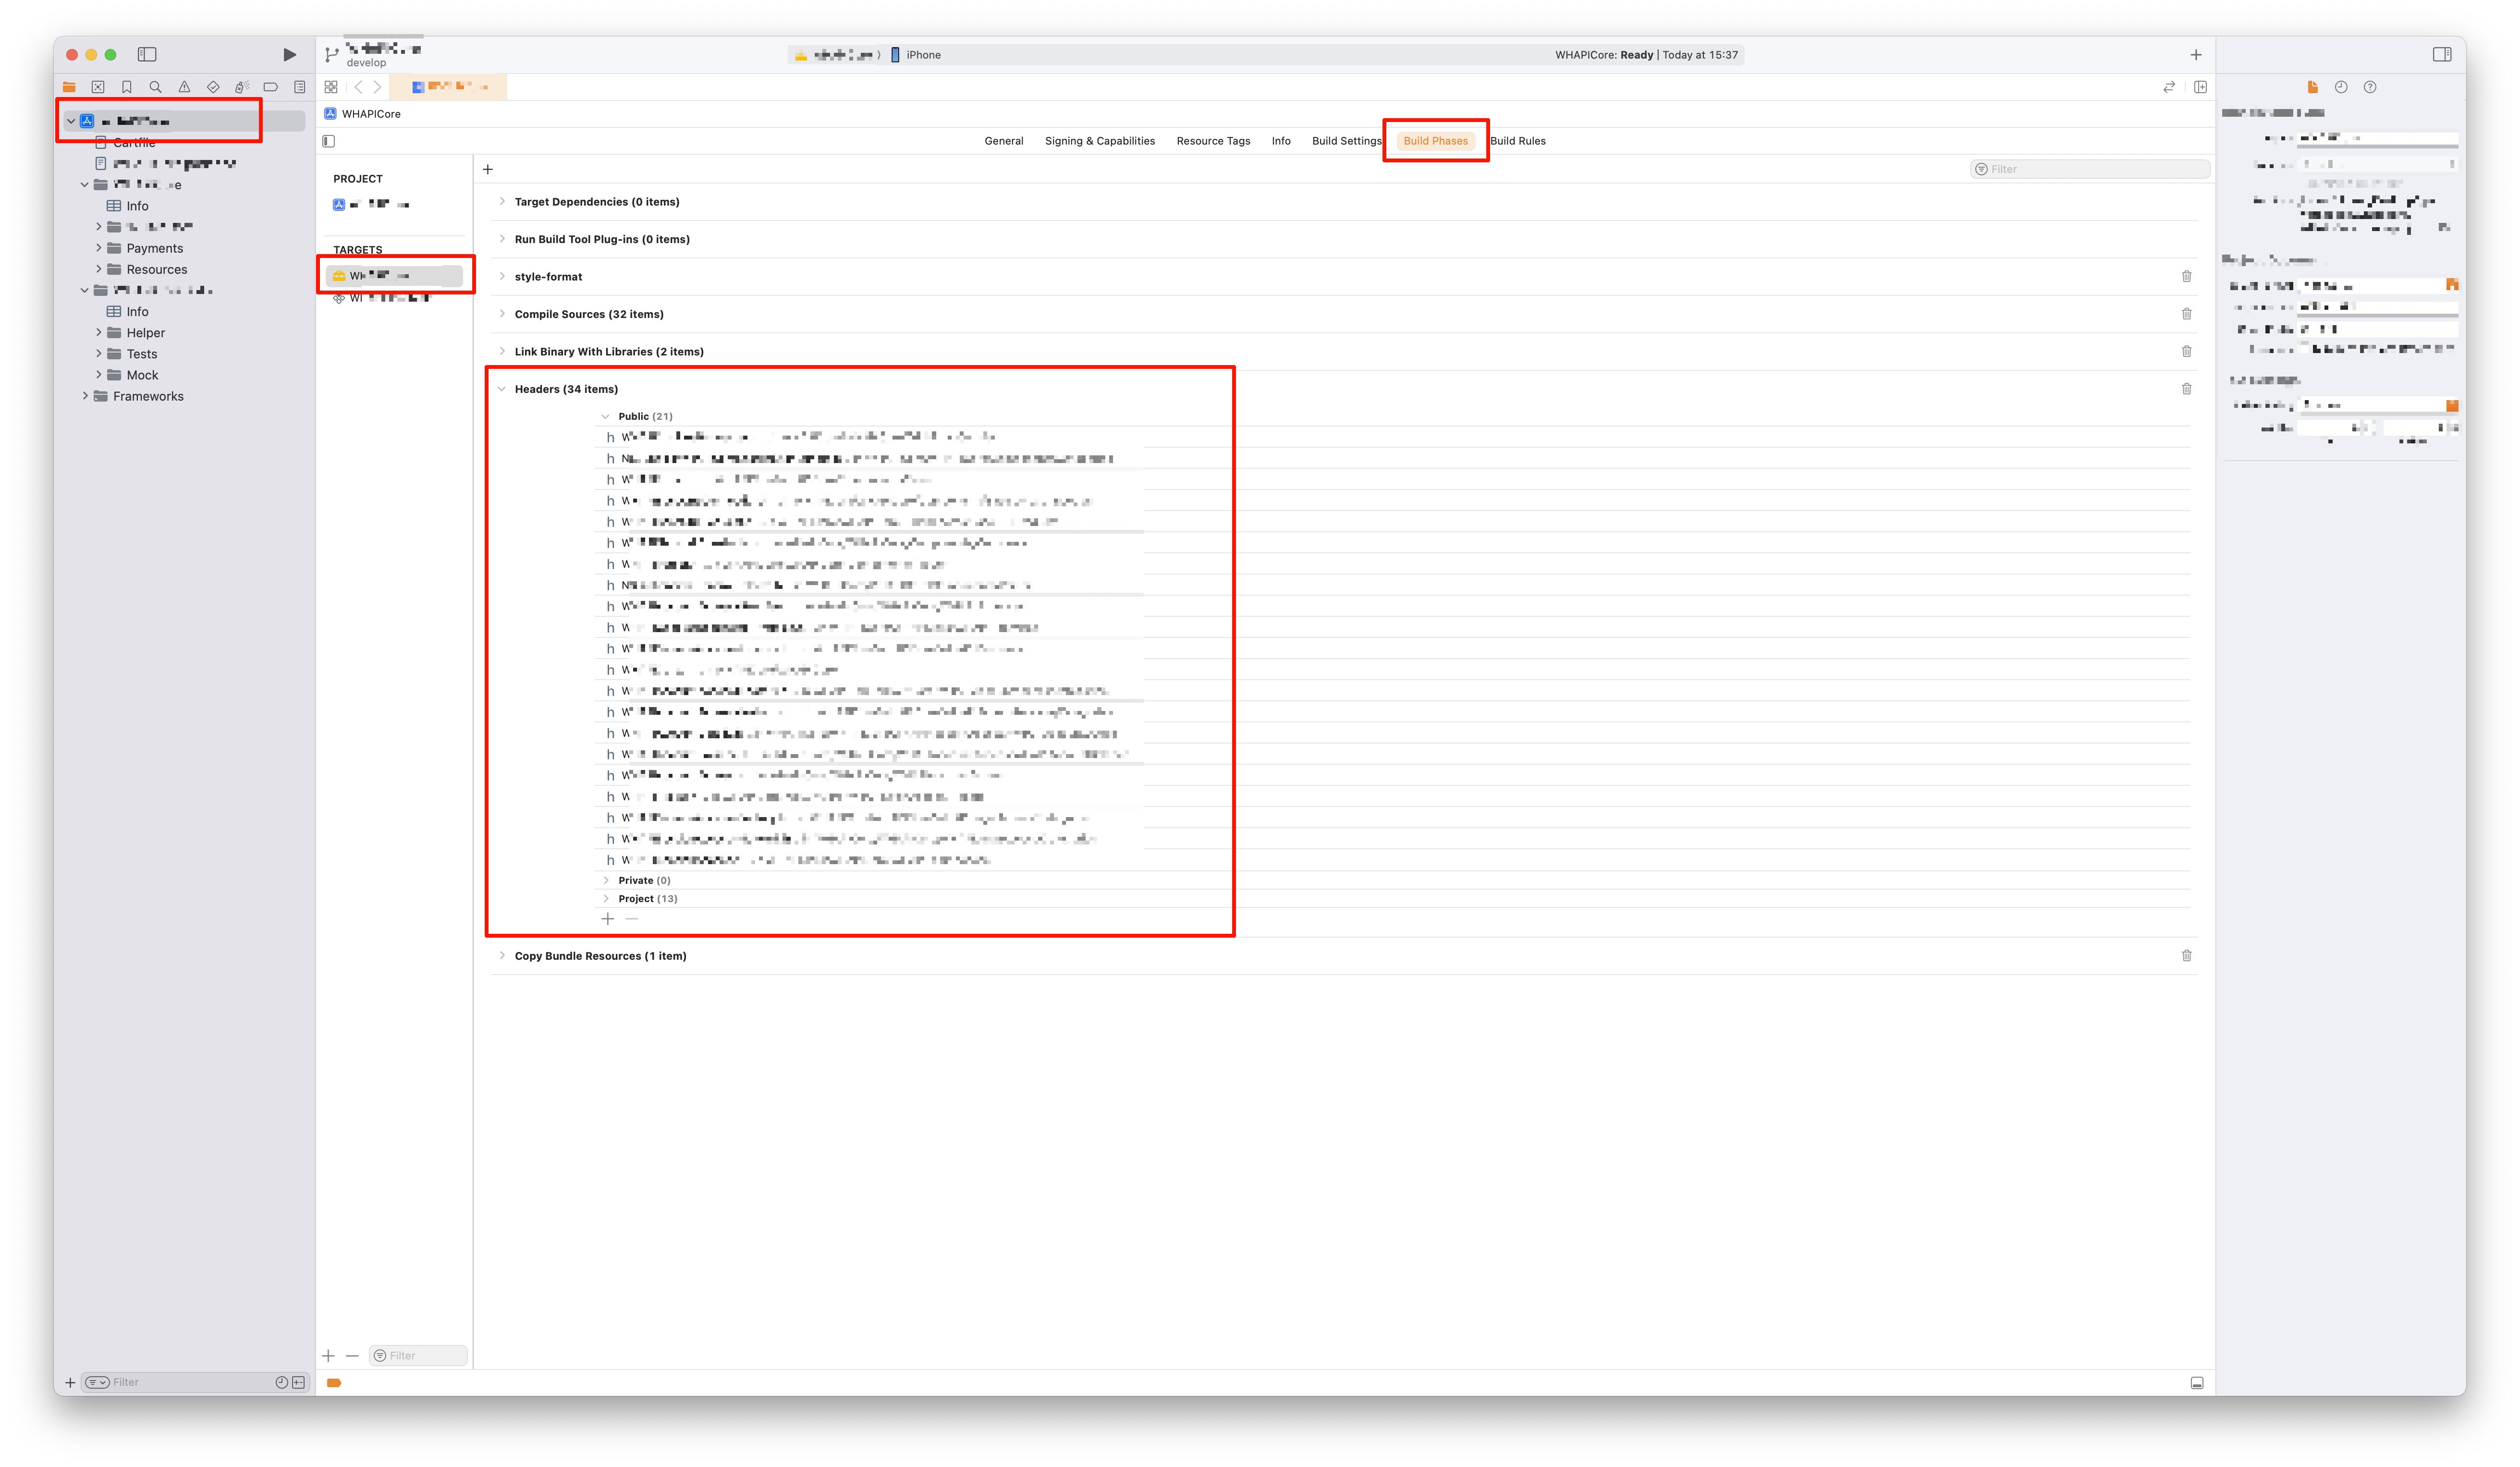
How do I locate my project’s public headers?
Your project most likely had an Xcode project file (.xcproj) before you started adding SPM support. You can find a list of your public headers in the “Build Phases” tab, under the “Headers” section.
After correctly configuring the public header files, your project might build. If it still doesn’t, you may have other header files that need to be discoverable. If that’s the case, you’ll need to add search paths for your private header files using headerSearchPath in your cSettings:
.target(
    name: "MyPackage",
    cSettings: [
        .headerSearchPath("Payments"),
        .headerSearchPath("Payments/ApplePayPaymentsService"),
        .headerSearchPath("Transactions/Components")
    ]),
It’s up to you whether you want to group all private header files in a single directory (.headerSearchPath("Path/To/My/Private/Headers")) or add all existing directories one by one using their current locations as I did in the snippet above.
With that done, you should now be able to build your project.
Troubleshooting
In my case, after migrating all dependencies to SPM and adding the package manifest, I was able to delete the Xcode project file entirely. If that is not the case for you, you might encounter additional issues.
One common problem is the error fatal error: framework '<some_framework>' not found when trying to import an SPM dependency into an Objective-C codebase in a project managed via an Xcode project file (.xcproj).
In this situation, you may need to experiment with your project settings. This thread on the Apple Developer Forums is an good starting point.
Conclusion
Once these steps are completed, you should be able to build your project. If you add your new package as a dependency via SPM, you can import it like any other Swift package. The same rules apply.
Swift:
import MyPackage
Objective-C:
@import MyPackage;
Resources
What helped me the most was looking at examples of existing Objective-C projects with SPM support. The following repositories are worth exploring:
- PSPDFKit/PDFXKit: A drop-in replacement for Apple’s PDFKit, powered by the PSPDFKit framework.
- AliSoftware/OHHTTPStubs: A library to easily stub your network requests.
- Mantle/Mantle: Model framework for Cocoa and Cocoa Touch